
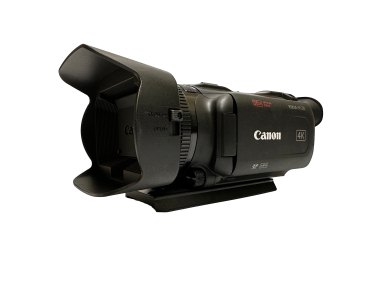
Canon VIXIA HF-G40
The compact and lightweight VIXIA HF G70 offers high quality 4K UHD video, a Canon 20x optical zoom lens, advanced autofocus, Slow Motion recording in 0.4x Full HD, Fast Motion recording in 4K/Full HD up to 1200x and HD livestreaming with UVC1 via a USB-C connection to a PC or Mac.
Shooting Video and Taking Photos
Click the battery into the battery compartment and then turn on the camcorder. To release the battery, slide the battery release switch underneath the battery compartment.
Open the lens cover (the switch is on the side of the lens hood.To use the viewfinder eyepiece, pull it out and adjust as necessary.
Use the dioptric adjustment on the eyepiece to focus the data text on screen to the viewers eyesight before focusing the lens.
Press START/STOP (the button is located just behind the side grip) to begin recording video. Press again to stop.
To take a photo, simply tap PHOTO on the LCD panel.
Playing Back Video and Photos
Set the power switch to MEDIA. The movie index will appear in the viewfinder.
Look for the clip to play back and tap it. The camcorder will play back the clip.
Dragging a finger across the screen will show the next page of clips. Tap the screen to show playback controls.
To adjust the volume in either the headphones or the camera's own speakers, simply drag a finger on the volume controls in the viewfinder.
Setting the Focus
Focus may be adjusted manually or automatically. For autofocus, the camera features face detection and tracking abilities. Although autofocus has its uses in some situations, it's really used by amateurs and should be avoided if trying to attain pristine images. The autofocus does not know inherently what should be in focus and might even shift the focus in the middle of the shot, effectively ruining the shot. Therefore, use the manual focus habitually. To do so, the lens must be calibrated.
Calibrate the lens for manual focus - EASY!! Zoom in all the way on the subject - Focus - then zoom out and compose the shot. It's that simple!
To Focus Manually
Set the focus/zoom ring to focus manually.
The FOCUS/ZOOM switch is at the back of the camera - set to FOCUS.
Make sure the camera mode is set to Manual - M. This switch is located above the zoom rocker on the side grip.
On the viewfinder controls, press the AF/MF button to select MF.
Zoom in all the way on the subject - Focus by turning the focus ring on the lens - then zoom out and compose the shot.
Focus Assist
Peaking - when focus is achieved in the shot, the edges of objects will be outlines in red, blue or yellow - depending on what colour is set in the Peaking menu.
Tap the FUNC on the LCD screen and then then the FOCUS and then tap PEAK.
FUNC > FOCUS > PEAK
Turn the focus ring until edges in the subject are highlighted in red, blue or yellow.
Setting Manual Exposure
The following instructions apply to using the camera manually, not automatically. In this course, it is expected to learn how to operate the camera the way professionals do. Using automatic features may be an easy way to start using the camera, but it limits choices. To the trained eye, these shots will also appear amateurish due to effects like "iris breathing", which can ruin the shot. In manual mode, colours will appear more vibrant, whites will look white and blacks will be richer.
Using the Manual functions of the camera is how to take control of the craft. Using automatic features regularly is a telltale sign of an unsophisticated shooter and may end up with footage that will leave nothing but grief in the post-production stage.
Therefore, we're not going to teach how to use the automatic features because the expectations among employers are that professionals know how to operate a camera. We want you to manually adjust your exposure, white balance and focus. If you treat manual operation as a burden, then reconsider why you want to enter the broadcast profession.
Setting the camera to Manual
Set the camera mode switch to M for manual. This switch is located above the zoom rocker on the side grip. Setting this switch to M will enable full access to the menu items that will manually adjust exposure, white balance and many other settings.
Setting the Record Programs
To operate the camera manually, the first thing needed to set the Record Program to M for Manual.
FUNC > Record Programs > M
A quick overview of the other Record Programs
- P - Programmed - this setting allows the camera to automatically adjust the aperture and shutter speed
- Tv Shutter Priority -By manually setting the shutter speed, the camera will automatically set an appropriate aperture value.
- Av Aperture Priority - By manually setting the aperture the camera will automatically set an appropriate shutter speed value.
Adjusting Exposure
Setting the record program to the M setting, the LCD will show the aperture (F-stops), Shutter Speed (appear as a fraction) and Gain (appear using the dB (decimal) value. Tapping each of these to changes the value.
F-Stop - this changes the aperture, which sets the amount of light that enters the lens. Tap on the F value and then tap the adjustment dial arrows below to change the F-stop. Smaller F-stops means more light can enter the lens.
Shutter Speed
this setting is useful when wanting to avoid blurs in fast motion. For example, faster shutter speeds will result in more defined edges in action shots at sporting events. But when increaseing the shutter speed, the amount of light that enters the lens is reduced. Start with a shutter speed of 1/60th of a second. Anything less will result in noticeable and even distracting motion blurs that could ruin the shot if not careful.
Gain
This setting is used only in low-light situations when there is not enough light entering the lens for an appropriately exposed shot. Gain strengthens the video signal making the image appear brighter, but too much gain will add noise to the image and can be distracting. Apply gain judiciously.
Zebra Pattern
This pattern of striped lines that appear over the monitor image is an exposure assist, helping to identify parts of the image that are overexposed. Use the zebra pattern to set exposure properly.
When setting the Manual Exposure mode in the LCD viewfinder, tap the Zebra Pattern icon just below the wrench. This will apply the zebra pattern to the image. Then adjust the exposure until most of the stripes in overexposed areas are reduced. Some areas like bright sky and lamps in the background may retain a zebra pattern.
Setting White Balance
White balance helps accurately reproduce colours that are more vivid under different colour temperatures. For instance, the colour temperature outdoors under sunny skies is 5600 K (Kelvin degrees). To the camera, this colour temperature appears blue or blue-ish. On the other hand, indoors the colour temperature is typically 3200 K, and to the camera the lighting appears reddish.
FUNC > White Balance
White balanceing is telling the camera what is supposed to look white under different colour temperatures. When setting the white balance for outdoor lighting conditions, the camera will apply more red in the image to balance out the blue; indoors the camera will apply more blue to balance out the red. White will appear more white and create images where the colour is more vibrant.
A list appears with numerous white balance settings to choose from.
- AWB - Automatic White Balance - the camera will determine the white balance, which is fine, but takes control away from the ability to reproduce colours more accurately.
- Daylight (sunshine icon) - used to help record daylight lighting condition.
- Shade (home icon) - to record in shaded places
- Cloudy (cloud icon) - useful on a cloudy day
- Fluorescent - warm white or cool white, or warm-white type of lighting.
- Fluorescent H - records under daylight-type spectrum fluorescent lighting
- Tungsten - when using tungsten (filament) studio lights
- K - colour temperature - allows the seting of the colour temperature to a desired value
- White balance icons 1 & 2 - for custom white balance settings - sets the white balance manually to make subjects appear white under coloured lighting.
To set White Balance manually
Select either the White Balance 1 or White Balance 2 settings. Point the camera at a white object (a white card preferably) and zoom in to fill the whole screen with white.
On the LCD screen, tap Set WB to set the white balance value and reproduce white accurately.
Audio
Using the built-in microphone, the camcorder can optimise audio using the Audio Scene function. But plugging in an external microphone is smart to get good reproduction of voices and dialogue especially in quiet environments.
FUNC> Audio Scene (there might be a need to scroll down to find Audio Scene). Tap Audio Scene to display the menu.
Then choose the desired audio scene:
- STD - Standard - used in most situations
- Music - vibrantly records music and singing situations
- Speech - best for recording voices and dialogue
- Forest and Birds - clearly records sounds in natural settings such as forests or mountains
- Noise Suppression - helps reduce noise from wind, passing vehicles or similar ambient sound
- Custom Setting - using the menus the camcorder can be set to a manual profile to record sound.
Using Headphones
Always use headphones during recordings to monitor the sound quality. Plugging in the headphones can be done in the compartment just in front of the side grip
Mic Level
Adjusting the audio input levels can only be done when using the Cinema or Manual mode and only when the Audio Scene is set to Custom Setting.
To set the the Custoomo setting use FUNC > Mic Level
It is possible to select A for automatic or M to adjust the levels manually. Use the audio level indicator to make sure that the audio levels reach the -12 dB mark, occasionally reaching slightly above. Beyond that the audio levels might sound distorted. Use the headphones to check the sound quality.
Using an External Mic
Plug the mic into the MIC terminal located next to the headphone terminal. The audio level indicator will be displayed automatically to adjust for optimal record levels.