
Sending DocuSign Envelopes from a Shared Template
These instructions will guide you through the process of sending a pre-configured document through DocuSign via a shared template.
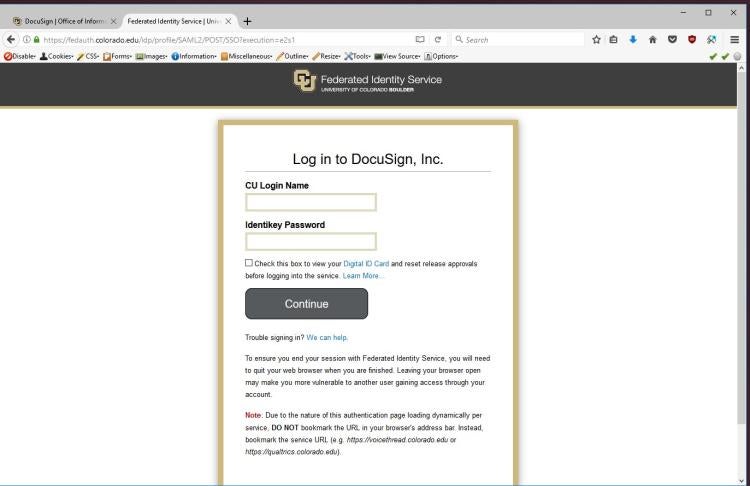
Step 1) Log in to DocuSign at https://docusign.colorado.edu with your IdentiKey userID and password.
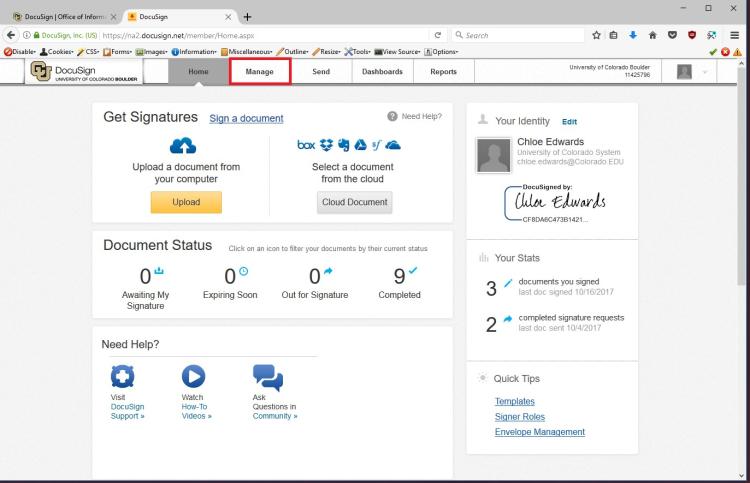
Step 2) Select the manage tab
Click on Manage located on the top navigation bar:

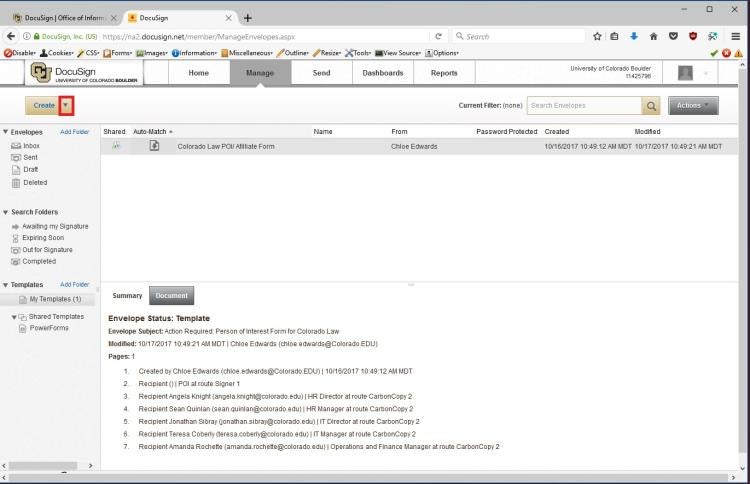
Step 3) Create a new envelope:
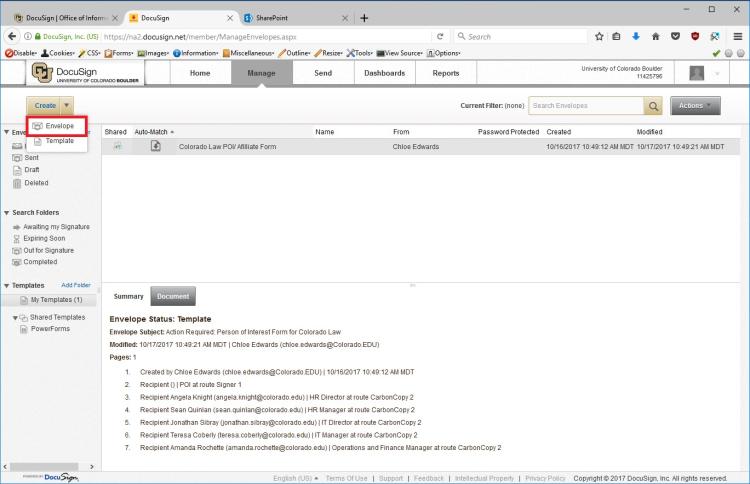
1) Click the down arrow in the create box:
2) Click on Envelope in the drop down menu:
Step 4) Apply template to envelope
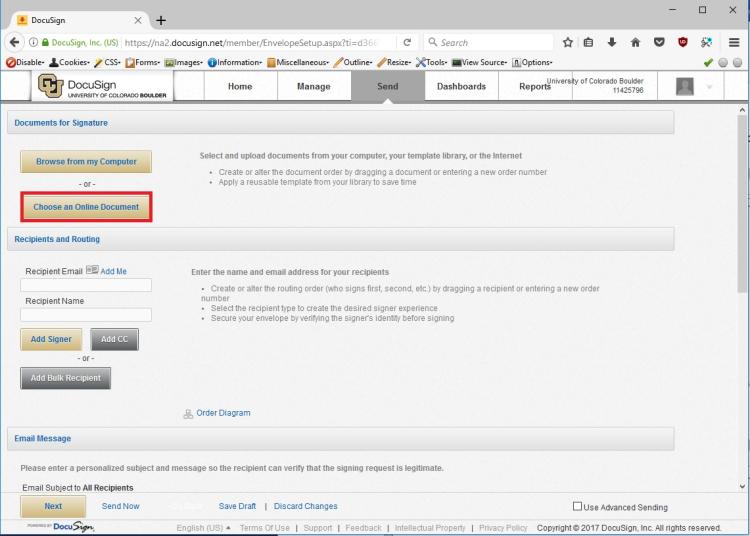
1) Under Documents for signature, click Choose an Online Document:
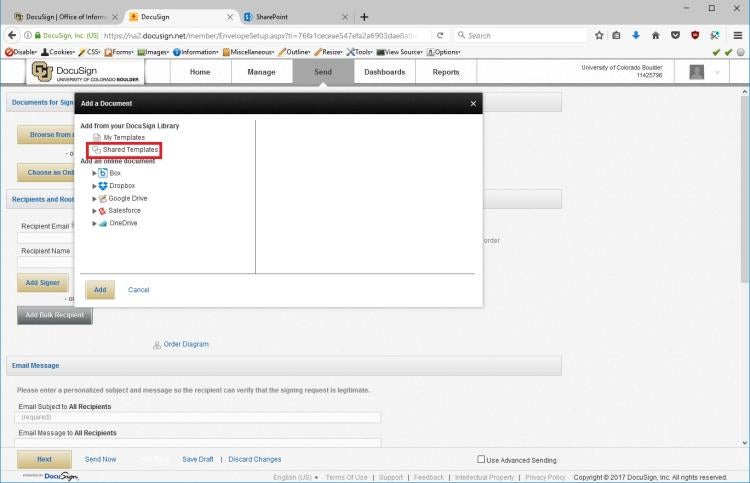
This menu appears:

2) Click Shared Templates:
3) Use the search bar to find the template you want.
After search results appear, click the check box to the left of the template you wish to use and then click Add:

Step 5) Prepareing your envelope
1) Documents: Confirm by title that you have the intended document. By clicking the document image, you can see a preview of the blank form.
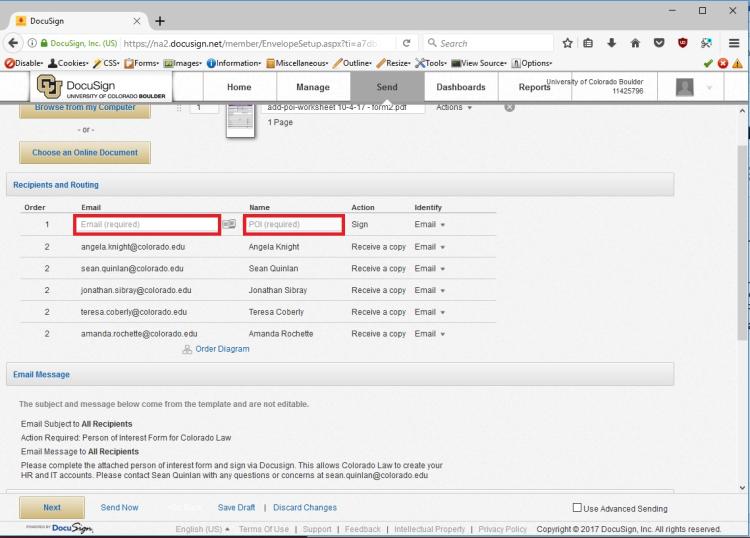
2) Routing and Recipients: Since you are using a template, most of the recipients, thier roles, and thier order will be locked, in general. You will need to fill in any blank slots with an email and a name:
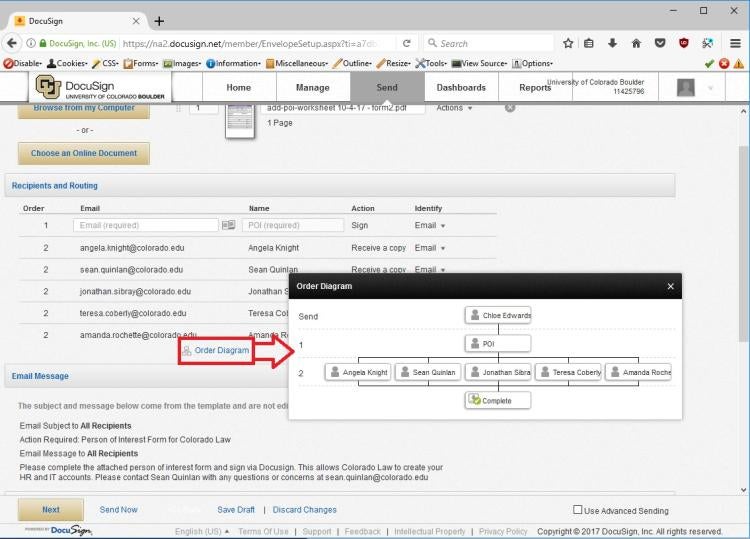
To see the workflow, click Order Diagram:
3) Press next:
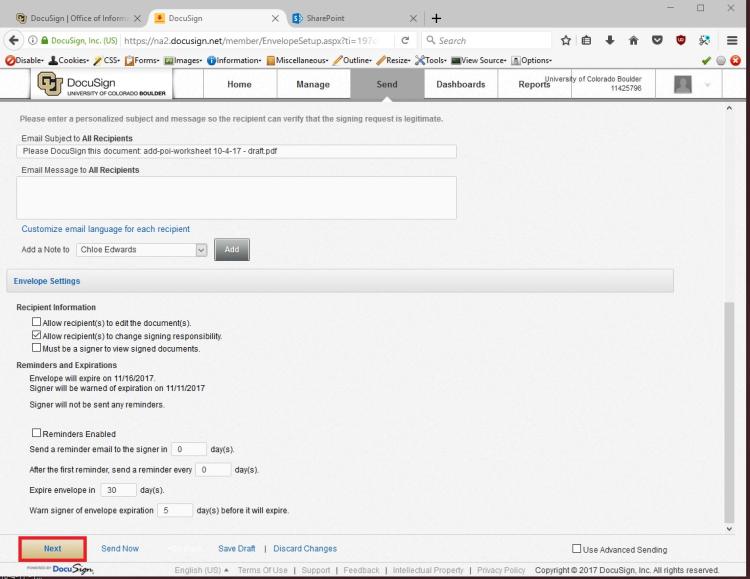
6) Verify the document and send the envelope
Since you are using a template, the fields on the document will be locked. Verify the recipients, the message, and the fields. Once you are satisfied with the document, you can preview it to see it from the signer's perspective and send it by using the Send and Preview buttons at the bottom:

7) Monitor the status of the document
After the document is sent, monitor the status of the document on the manage tab. On the manage tab, open your sent envelopes:

Click on an envelope to see the status:

If there are issues, questions, or concerns with the template, contact the template owner or Law IT.